Suchaya Swang-ngam #36 M.3/14
Wednesday, December 19, 2012
Wednesday, December 12, 2012
ALMOND MERINUES
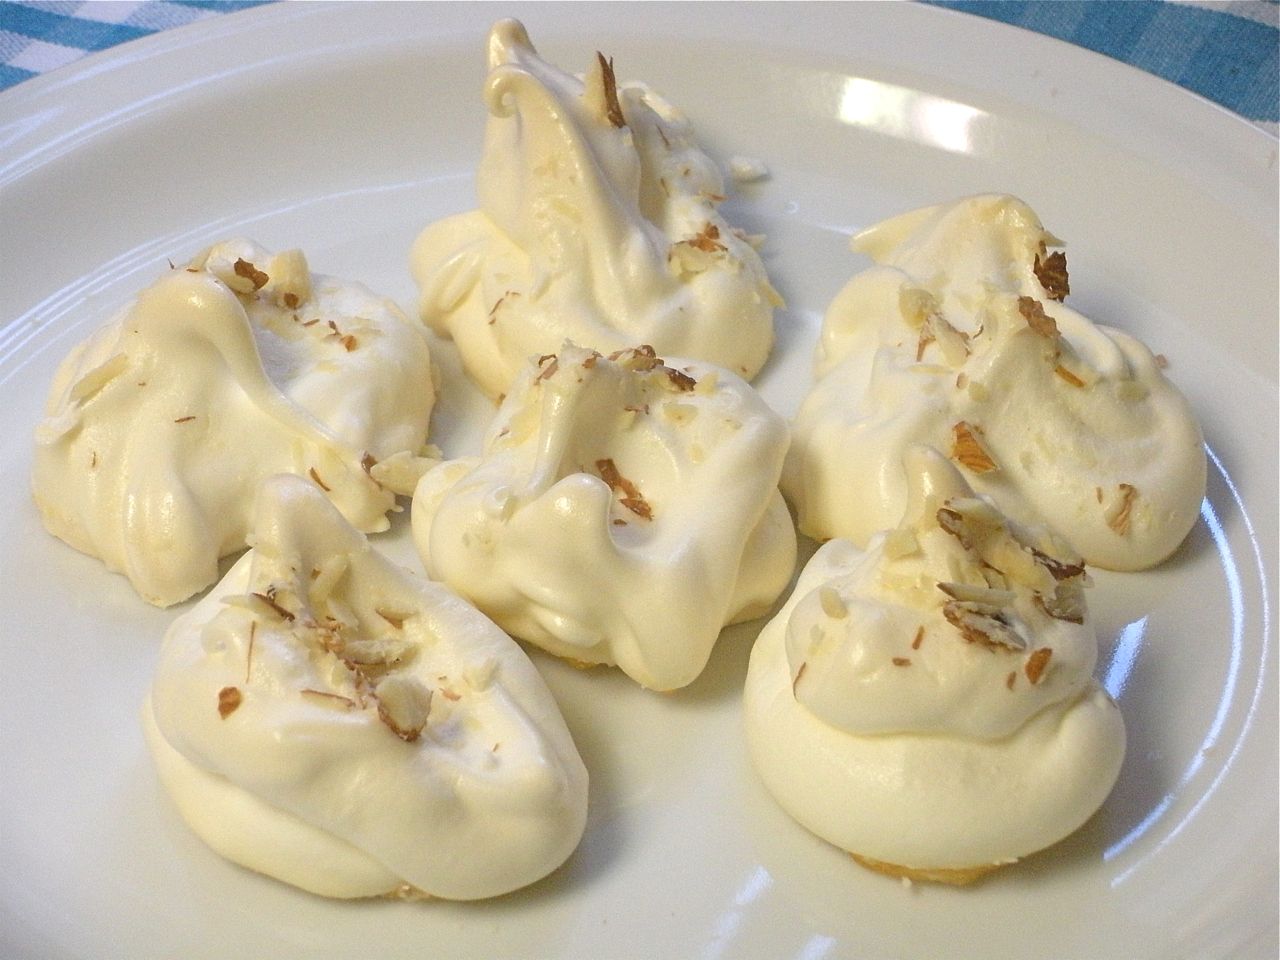
ALMOND MERINGUES RECIPE
Ingredients
3 egg whites
1/4 teaspoon cream of tartar
3/4 cup of sugar
1/2 teaspoon of almond extract
1/2 cup toasted finely chopped almond
1/2 cup toasted coconut flakes
Method
- Heat oven to 190C/170C fan/gas 5. Scatter the almonds on a baking sheet and roast for 6-8 mins until golden. Very coarsely grind them in a small food processor, then set aside. Lower oven to 160C/fan 140C/gas 3. Line a baking sheet with non-stick baking parchment.
- Beat the egg whites in a scrupulously clean mixing bowl until stiff peaks have formed. Tip in half the sugar and beat again until stiff peaks are formed once more. Using a metal spoon, deftly fold in the remaining sugar a spoonful at a time, followed by most of the almonds (keep a small handful back). Tip the meringue onto the lined sheet and spread it out quite roughly to a 20cm circle. Scatter over the reserved almonds. Bake for 20 mins, reduce the temperature to 140C/120C fan/gas 1, then bake for a further 40 mins. Let meringue cool in the oven with the door ajar or on the side as you wish.
- While the meringue is baking, and if you wish to add the glamour of a raspberry ripple to the cream, make a few spoonfuls of purée by pressing 125g of the raspberries through a sieve.
- When nearing the moment for assembly, whip the cream until soft and cloudy. Lightly ripple through about half, or more, of the raspberry purée through the cream. You can serve the rest separately on the side. Place the meringue upon a handsome dish. Spoon the whipped cream liberally over the meringue. Slice the strawberries in a random manner. Heap the berries atop the cream, and offer any remaining fruit separately. Sift over the icing sugar. Take to the table and take a bow.
Wednesday, December 5, 2012
Sunday, December 2, 2012
BLUEBERRY MUFFINS
BLUEBERRY MUFFINS RECIPE
Ingredients
5 tablespoons unsalted butter
1/2 sugar
1 large egg
3/4 cup sour cream
1/2 teaspoons grated lemon zest
1 1/2 cups all-purpose flour
1 1/2 teaspoon baking power
1/4 teaspoon baking soda
1/4 teaspoon salt
3/4 cup blueberries
Method
- Heat oven to 180C/fan 160C/gas 4 and line a 12-hole muffin tin with paper muffin cases. Tip the flour and bicarbonate of soda into a large bowl. Hold back 1 tbsp of the sugar, then mix the remainder with the flour and 50g oats. Make a well in the centre. In a separate bowl, mash the bananas until nearly smooth. Stir the buttermilk, oil and egg whites into the mashed banana until evenly combined.
- Pour the liquid mixture into the well and stir quickly and sparingly with a wooden spoon. The mix will look lumpy and may have the odd fleck of flour still visible, but don't be tempted to over-mix. Tip in the blueberries and give it just one more stir. Divide the mix between the muffin cases - they will be quite full - then sprinkle the tops with the final tbsp of the oats and the rest of he sugar. Bake for 18-20 mins until risen and dark golden. Cool for 5 mins in the tray before lifting out onto a rack to cool completely.
Saturday, December 1, 2012
VANILLA CUPCAKES
VANILLA CUPCAKES RECIPE
Vanilla Cupcakes:
1/2 cup (113 grams) unsalted butter, room temperature2/3 cup (130 grams) granulated white sugar3 large eggs1 teaspoon pure vanilla extractZest of 1 large lemon (outer yellow skin)1 1/2 cups (195 grams) all purpose flour1 1/2 teaspoons baking powder1/4 teaspoon salt1/4 cup (60 ml) milk.
Confectioners (Buttercream) Frosting:2 cups (230 grams) confectioners sugar (icing or powdered sugar), sifted1/2 cup (113 grams) unsalted butter, room temperature1 teaspoon pure vanilla extract2 tablespoons milk or light creamAssorted food colors (if desired)
|
Wednesday, November 28, 2012
A THOUSAND YEARS
Heartbeats fast
Colors and promises
How to be brave
How can I love when I'm afraid to fall
But watching you stand alone
All of my doubt suddenly goes away somehow
One step closer
I have died everyday waiting for you
Darling don't be afraid I have loved you
For a thousand years
I love you for a thousand more
Time stands still
Beauty in all she is
I will be brave
I will not let anything take away
What's standing in front of me
Every breath
Every hour has come to this
One step closerI have died everyday waiting for you
Darling don't be afraid I have loved you
For a thousand years
I love you for a thousand more
And all along I believed I would find you
Time has brought your heart to me
I have loved you for a thousand years
I love you for a thousand more
One step closer
One step closer
I have died everyday waiting for you
Darling don't be afraid I have loved you
For a thousand years
I love you for a thousand more
And all along I believed I would find you
Time has brought your heart to me
I have loved you for a thousand years
I love you for a thousand more
Thursday, November 22, 2012
RED VALVET CUPCAKES
RED VELVET CUPCAKES RECIPE

Intimidated by baking, assembling, and decorating a homemade red velvet cake for Valentine’s Day? Give cupcakes a try instead!
As you probably know, I have already written about my husband’s family recipe for a gorgeous Red Velvet Cake.
But when I noticed that lots of readers were asking questions about how
to turn the cake recipe into a cupcake recipe, I decided it was time to
give it a try myself!
At first I was going to try a version using less red food coloring
than the cake recipe, but at the last minute I decided to stay true to
the original. These aren’t pink, they aren’t reddish-brown, they are a
dramatic RED, perfect for Valentine’s Day! And in addition to the
beautiful color, these little cakes are light, tender, and downright
delicious!
There are several different types of red velvet cake. Some are
heavier on the chocolate flavor than others, some use less food
coloring, and some use beets instead of artificial coloring. This one
does not taste like a chocolate cake, although there is a subtle hint of
cocoa. The flavor is unique and delicious, and I prefer it to the red
velvet cakes that contain more cocoa powder. And as I’ve already
mentioned, this cake recipe does not shy away from the food coloring!
Although red velvet cake is definitely a Southern tradition, it’s
popularity has never been limited to the South. The recipe I’m going to
share today is also called Waldorf-Astoria Cake, and is supposedly
based on a red velvet cake that was popular at the New York hotel in the
1920′s. For more on the history of red velvet cake, check out this
great New York Times article.
But regardless of where the cake originated, red velvet cakes and
cupcakes have become an American tradition that is holding on strong.
Whether it’s Christmas, Valentine’s Day, a birthday, or even a wedding
day, red velvet is a wonderful way to celebrate!

Red Velvet Cupcakes
2 1/2 cups sifted cake flour*
1 teaspoon baking powder
1 teaspoon salt
2 tablespoons unsweetened cocoa powder
2 oz. red food coloring (two bottles)
1/2 cup unsalted butter, softened
1 1/2 cups sugar
2 eggs, at room temperature
1 teaspoon vanilla extract
1 cup buttermilk, at room temperature
1 teaspoon white vinegar
1 teaspoon baking soda
1. Preheat oven to 350 degrees. Line two 12-cup muffin tins with cupcake papers.
2. Sift together the cake flour, baking powder, and salt into a
medium bowl; set aside. In a small bowl, mix food coloring and cocoa
powder to form a thin paste without lumps; set aside.
3. In a large bowl, using a hand mixer or stand mixer, beat butter
and sugar together until light and fluffy, about three minutes. Beat in
eggs, one at a time, then beat in vanilla and the red cocoa paste,
scraping down the bowl with a spatula as you go. Add one third of the
flour mixture to the butter mixture, beat well, then beat in half of the
buttermilk. Beat in another third of flour mixture, then second half of
buttermilk. End with the last third of the flour mixture, beat until
well combined, making sure to scrape down the bowl with a spatula.
4. In a small bowl, mix vinegar and baking soda. Yes, it will fizz!
Add vinegar mixture to the cake batter and stir well to combine. Using
an ice cream scoop, fill cupcake cups with cake batter (they should be
2/3 – 3/4 full). You may not fill all the cups, I ended up with 20
cupcakes. Place muffin tins on the middle rack of a preheated 350
degree oven. Bake for approximately 20-22 minutes, rotating pans
halfway through. Cupcakes are done when a toothpick inserted in the
center comes out clean. Check early and don’t overbake!
5. Cool the cupcakes in their tins on a wire rack for 10 minutes then
remove and allow to cool completely before frosting. Frost cupcakes
with cream cheese icing (recipe below) and decorate with red sprinkles if desired. The cupcakes above were decorated using the Wilton Cupcake Decorating Kit and Valentine’s Sprinkles. They can usually be found at craft stores like Michaels or Joann.
6. Enjoy the cupcakes with those you love!

Recipe Notes: *Sift cake flour once before
measuring, then sift again with the other dry ingredients per recipe
instructions. Wear an apron and be careful with the red food coloring–no
matter how hard I try, I always end up staining something! As you’re
mixing the cake batter, use a spatula to scrape down the bowl frequently
throughout the entire process. Since the batter is fairly thick, I
have found that an old-fashioned ice cream scoop
works best for filling the cupcake wells (also great for muffin
batter!). Since all ovens are different, make sure you check the
cupcakes a little early. Mine were ready in just over 2o minutes, yours
may be done sooner, or they may take a minute or two longer.
Cream Cheese Frosting
16 oz. cream cheese (2 packages), softened
1/2 cup unsalted butter (one stick), softened
1 teaspoon vanilla extract
2 1/2 cups powdered sugar, sifted
pinch of salt
1/2 cup unsalted butter (one stick), softened
1 teaspoon vanilla extract
2 1/2 cups powdered sugar, sifted
pinch of salt
With an electric mixer, blend together cream cheese and butter until
smooth. Turn mixer to low speed and blend in powdered sugar, salt and
vanilla extract. Turn mixer on high and beat until light and fluffy.
Use immediately or refrigerate, covered, until ready to use. If
refrigerated, the frosting will need to be brought to room temperature
before using (after frosting softens up, beat with mixer until smooth).
Recipe Notes: If you prefer a sweeter and/or stiffer
frosting, more powdered sugar can be added (up to four cups). But
remember, the more sugar you add, the less you’ll be able to taste the
tangy cream cheese!
Sunday, November 18, 2012
MACARONS
FRENCH MACARON RECIPE
(CREDIT : AmberLee, and Giverslog )
I hope my notes here about making French macarons for the first time help you out. I’d love to hear how it turns out.
 I’ve
had a hankering to make macarons for some time. I love basic recipes
for simple foods that are all about getting the technique right. Plus
macarons are such estimable little desserts, and they freeze so well,
that they are great to make in advance for a party or for friends who
will appreciate them.
I’ve
had a hankering to make macarons for some time. I love basic recipes
for simple foods that are all about getting the technique right. Plus
macarons are such estimable little desserts, and they freeze so well,
that they are great to make in advance for a party or for friends who
will appreciate them.
I found the process of making macarons to be every bit as delicate as
I expected, but doable. It is a thrill to get a batch come out of the
oven with a pretty dome and that perfect foot, it feels like sinking a
perfect putt or hitting a perfect shot. So even though I went to bed
exhausted, I woke up thinking of little alterations I could make next
time to get the perfect batch.
And once you have macarons down, you will be a whiz at turning out a beautiful souffle. It uses all the same tricks (get a favorite chocolate souffle recipe of mine and tutorial here).

Do you like the tag? I’ll post a copy here for you to download in case you’d like to use it.
French Macarons Tag, printable (20294)
After my day of experimenting with different batches, here are some
lessons learned. Martha has two recipes online, and I went with her
recipe from the June 2008 issue of Living, written by NYC cooking
instructor Gail Monaghan (author of Lost Desserts. )
)
French Macarons
(recipe from MarthaStewart.com
posted here with annotations)
makes about 35 macaron shells
(recipe from MarthaStewart.com
posted here with annotations)
makes about 35 macaron shells
Before you begin:
Choose a nice, cool, dry day to make these. Humidity is not your friend. Because whipped whites are mostly air, if the air is too moist it can flatten your macarons. A hot kitchen can also deflate whites.
Separate your eggs in advance. Eggs are easier to separate when they’re cold, so separate them at least an hour and up to a day before, then cover with plastic wrap so it touches the surface of the egg, and just leave the whites on the counter.
Mis en place. Have everything you need in place so you don’t have anything to slow you down once your eggs are whipped.
Ingredients
1 cup confectioners’ sugar, 4.5 oz
3/4 cup almond flour, 2.5 oz. (I’ve made my own by processing almond slivers, but just buying it is simpler)
2 large egg whites, room temperature (no farm fresh eggs! older eggs hold air better, and take them from the fridge the day before or the morning of and let them sit there happily on the counter and warm to room temp)
Pinch of cream of tartar
1/4 cup superfine sugar, 1.5 oz. (also called baker’s sugar, I’ve read you can make your own by processing granulated sugar, but have never tried it)
3/4 cup seedless raspberry jam, for filling
See MACAROON VARIATIONS and SUGGESTED FILLINGS
on Martha’s website, including chocolate, coconut, peanut, pistachio,
raspberry, and vanilla bean. UPDATE: Or see the comments below! Some of
you have come up with amazing flavor ideas.
Method
1. Pulse confectioners’ sugar and almond flour in a food processor until combined. Sift mixture 2 times. (I found sifting with my usual flour sifter near impossible. The almond flour caked under the sifting hand and balled up over it. Instead I sifted with a simple bowl-shaped sieve.)
1. Pulse confectioners’ sugar and almond flour in a food processor until combined. Sift mixture 2 times. (I found sifting with my usual flour sifter near impossible. The almond flour caked under the sifting hand and balled up over it. Instead I sifted with a simple bowl-shaped sieve.)
2. Whisk whites with a mixer on medium speed until
foamy. Add cream of tartar, and whisk until soft peaks form. Reduce
speed to low, then add superfine sugar. Increase speed to high, and
whisk until stiff peaks form (the recipe suggests 8 minutes, for me it
took only 3 to 4 minutes, take care not to over-whip). If you’re going
to add color, I added food coloring towards the end of whipping my
whites. I found I could use standard, water-based food coloring. Several
of the recipes I saw recommended paste food coloring, but I didn’t have
any at the time, so I went out on a limb! The water-based colors worked
just fine.

3. Sift flour mixture over whites, and fold until mixture is smooth and shiny. I found the amount of folding to be crucial. Fold too little, and your macaron shells will have peaks instead of nice rounded caps. Fold too much, and your meringue will drip into a mess of wafer-thin blobs. Tartlette recommends about 50 folds, until your batter has a magma-like flow. For me about 65 folds was just right. I find the batter has a little of a soft-toffee like sheen when it is ready. (UPDATE 02.10: stop by here to read about a macaron class Tartlette taught). You can test a daub on a plate, and if a small beak remains, turn the batter a couple times more. If the batter forms a round cap but doesn’t run, it is just right. When I spooned my batter into the pastry bag, the perfect batter started to just ooze out of the tip once the bag was full. If it stayed stiff inside the bag it was too stiff, if it dripped out too fast the batter was too runny. I found that doubling the recipe made this step very difficult for me, I found I would over fold to incorporate the flour mixture and I would end up with a runny batter.

4. Transfer batter to a pastry bag fitted with a 1/2-inch plain round tip.
5. Pipe 3/4-inch rounds 1 inch apart on
parchment-lined baking sheets. I put the tip right in the middle of
where I wanted each macaron and let the batter billow up around it, then
I drug the tip to the side of the round. (You can pipe 1-inch to 2-inch
rounds, but you will need to add cooking time). Tap bottom of each
sheet on work surface to release trapped air. Let stand at room
temperature for 30 to 45 minutes. (Different recipes recommend anywhere
from no rest time to 2 hours rest time. I was most happy with 30 to 45
minutes rest time, once the caps looked more dull and had formed a
slight skin, so that during baking the macaron could puff up beneith
that skin and form that pretty “foot” at the bottom.) While they’re
resting, preheat oven to 375 degrees.
6. Reduce oven temperature to 325 degrees. Bake 1
sheet at a time, rotating halfway through, until macarons are crisp and
firm, about 10 minutes. After each batch, increase oven temperature to
375 degrees, heat for 5 minutes, then reduce to 325 degrees. Every oven
is different, so you may need to play with your oven temperature. The
tops of the macaron shells should not brown.
7. Let macarons cool on sheets for 2 to 3 minutes,
then transfer to a wire rack. If macarons stick, spray water underneath
parchment on hot sheet. The steam will help release macarons (if this
doesn’t work, see below, under “troubleshooting”).
8. Sandwich 2 same-size macarons with 1 teaspoon
jam. Serve immediately, or stack between layers of parchment, wrap in
plastic, and freeze for up to 3 months. It takes only 30 minutes out of
the freezer for macarons to be ready to serve.
 TROUBLESHOOTING:
If you’re wringing your hands in frustration because you can’t get
these little desserts to come out right, either they are hollow inside
or have no feet or they crack, you are in good company. Me included.
Here are a few things you can try to get that first perfect batch that
will get you addicted to making macarons.
TROUBLESHOOTING:
If you’re wringing your hands in frustration because you can’t get
these little desserts to come out right, either they are hollow inside
or have no feet or they crack, you are in good company. Me included.
Here are a few things you can try to get that first perfect batch that
will get you addicted to making macarons.
1. Use an oven thermometer: Chances are, your oven
is different than mine, which is different from many other friends and
bloggers who have attempted macarons. Pay a couple dollars for a decent
oven thermometer and you can know for certain that your oven temp is
right. Undercooked macarons will end up hollow or deflate after cooking.
2. Use a good baking sheet: If your baking sheet is too thin, the macarons won’t bake evenly or correctly. You can even try doubling up two thin baking sheets if that’s all you have.
3. Use old eggs: I know this may sound wrong, just wrong, but it makes a difference. Use eggs that are not too fresh and leave them on the counter at room temp for a day or two.
4. Make sure you have prime egg-whipping conditions. Trust me, a humid day or one streak of grease in your bowl can make what could have been a beautiful batch of macarons into a disappointment.
5. If your macarons have no feet, make sure they had their time on the counter (after piping and before baking) to create a skin. I love what Evelyn said below: “NO skin No feet… ” When your macarons form a skin before you bake them, the skin traps the air under the dome so that the air’s only way to escape is through the bottom, creating feet as it goes.
6. Don’t over or under fold your batter. I know, I know, we’ve been through this. But if you let your macarons sit on the counter for 45 minutes to form a skin and you’re still asking yourself, “why don’t my macarons have feet?” the answer is probably that you underfolded so the batter is too stiff or overfolded so it is too loose. And if you come up with a different reason, I’d love to hear.
7. Increase cooking time for bigger macarons: I’ve undercooked my macarons before and had them come out hollow. Pretty still but very disappointing in texture. Make sure that if your macarons are bigger circles, you bake longer.
8. Keep an eye on your macarons to avoid browning them or letting them crack: I love these notes note from Beth and Zach (thanks you two!!): “I bake mine with the light on in the oven so I can monitor what’s going on in there. If it seems a little hot, crack the door and stick a wooden spoon in to hold it slightly ajar. I believe the cracking happens when the oven it too hot.” “The steam produced is escaping too fast to exit out only the bottom; thus the top (even with that “skin”) has no option but to break and crack the top. If this happens consistently, turn down the heat a few degrees (no more than 10 degress 5 preferable). “
9. If you macarons won’t unstick, try water (and cook longer next time). Here’s a great tip from a reader whose macaron shells stuck to the paper. (Thank you, Jennifer!!) “The steam did not work for me, I think because my paper is fairly thick. So I rested the paper (with the Macarons stuck to it) on a thin layer of water. I counted to 15 which is just enough to soften the paper without getting the Macarons wet. They pulled off flawlessly! You may have to adjust how long you let it sit depending on the type of paper you use, so as not to wet your Macarons!” And it’s also likely, if your macarons stick, that you didn’t cook quite long enough.
10. What about a confection oven? Thanks to Zach for this note!: A convection oven should work just fine. But you should reduce cooking time becasue of the moving air, which will help prevent the cracking. If your convection oven is too hot or the air flow setting is on “high” (if apliccable), then then extra drying might make cracking more possible.

Wednesday, November 7, 2012
GINGERBREAD COOKIES

GINGERBREAD COOKIES RECIPE
Ingredients
- 1/2 cup butter, cubed
- 1/2 cup Imperial Sugar® / Dixie Crystals® Granulated Sugar
- 1/2 cup molasses
- 2 teaspoons white vinegar
- 1 egg, lightly beaten
- 3 cups all-purpose flour
- 1/2 teaspoon baking soda
- 1/2 teaspoon ground ginger
- 1/2 teaspoon ground cinnamon
- 1/4 teaspoon salt
- Decorating icing, nonpareils, red-hot candies or candies of your choice, optional
- In a large saucepan, combine the butter, sugar, molasses and vinegar; bring to a boil, stirring constantly. Remove from the heat; cool to lukewarm. Stir in egg. Combine the flour, baking soda, ginger, cinnamon and salt; stir into molasses mixture to form a soft dough.
- Divide dough into thirds. Shape each portion into a disk; wrap in plastic wrap. Refrigerate for at least 2 hours or until easy to handle.
- On a lightly floured surface, roll dough to 1/4-in. thickness. Cut with a floured 3-in. gingerbread boy cookie cutter. Place on greased baking sheets. Bake at 375° for 7-9 minutes or until edges are firm. Remove to wire racks; cool completely. Decorate as desired. Yield: 3-4 dozen.
LITTLE THINGS :)
[Zayn] Your hand fits in mine
Like it's made just for me
But bear this in mind
It was meant to be
And I'm joining up the dots
With the freckles on your cheeks
And it all makes sense to me
[Liam] I know you've never loved
The crinkles by your eyes when you smile
You've never loved
Your stomach or your thighs
The dimples in your back at the bottom of your spine
[Zayn + Liam] But I'll love them endlessly
I won't let these little things slip out of my mouth
But if I do,
It's you,
Oh it's you,
They add up to
I'm in love with you,
And all these little things
[Louis] You can't go to bed,
Without a cup of tea,
And maybe that's the reason why you talk in your sleep
And all those conversations
Are the secrets that I keep
Though it makes no sense to me
[ Lyrics from: http://www.lyricsfreak.com/o/one+direction/little+things_21048236.html ]
[Harry] I know you've never loved the sound of your voice on tape
You never want to know how much you weigh
You still have to squeeze into your jeans
[Harry + Niall] But you're perfect to me
I won't let these little things slip out of my mouth
But if it's true,
It's you,
It's you,
They add up to
I'm in love with you,
And all these little things
[Niall] You'll never love yourself
Half as much as I love you
You'll never treat yourself right, darlin'
But I want you to,
If I let you know, I'm here for you,
Maybe you'll love yourself,
Like I love you
Oh,
[Harry] And I've just let these little things slip out of my mouth,
Because it's you,
Oh it's you,
It's you,
They add up to
And I'm in love with you,
And all these little things,
[All] I won't let these little things slip out of my mouth,
But if it's true,
It's you,
It's you,
They add up to,
And I'm in love with you,
And all your little things
Subscribe to:
Posts (Atom)