RED VELVET CUPCAKES RECIPE

Intimidated by baking, assembling, and decorating a homemade red velvet cake for Valentine’s Day? Give cupcakes a try instead!
As you probably know, I have already written about my husband’s family recipe for a gorgeous Red Velvet Cake.
But when I noticed that lots of readers were asking questions about how
to turn the cake recipe into a cupcake recipe, I decided it was time to
give it a try myself!
At first I was going to try a version using less red food coloring
than the cake recipe, but at the last minute I decided to stay true to
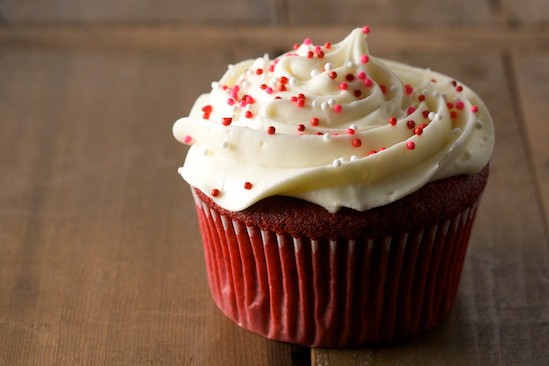
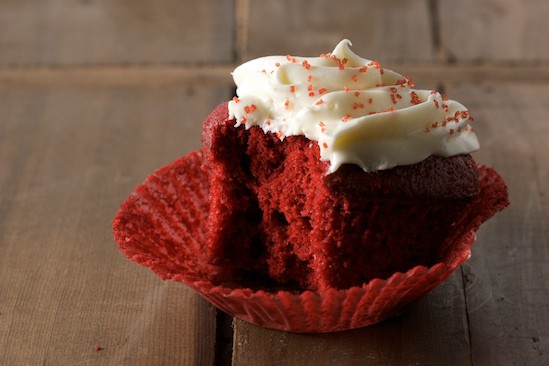
the original. These aren’t pink, they aren’t reddish-brown, they are a
dramatic RED, perfect for Valentine’s Day! And in addition to the
beautiful color, these little cakes are light, tender, and downright
delicious!
There are several different types of red velvet cake. Some are
heavier on the chocolate flavor than others, some use less food
coloring, and some use beets instead of artificial coloring. This one
does not taste like a chocolate cake, although there is a subtle hint of
cocoa. The flavor is unique and delicious, and I prefer it to the red
velvet cakes that contain more cocoa powder. And as I’ve already
mentioned, this cake recipe does not shy away from the food coloring!
Although red velvet cake is definitely a Southern tradition, it’s
popularity has never been limited to the South. The recipe I’m going to
share today is also called Waldorf-Astoria Cake, and is supposedly
based on a red velvet cake that was popular at the New York hotel in the
1920′s. For more on the history of red velvet cake, check out this
great New York Times article.
But regardless of where the cake originated, red velvet cakes and
cupcakes have become an American tradition that is holding on strong.
Whether it’s Christmas, Valentine’s Day, a birthday, or even a wedding
day, red velvet is a wonderful way to celebrate!

Red Velvet Cupcakes
2 1/2 cups sifted cake flour*
1 teaspoon baking powder
1 teaspoon salt
2 tablespoons unsweetened cocoa powder
2 oz. red food coloring (two bottles)
1/2 cup unsalted butter, softened
1 1/2 cups sugar
2 eggs, at room temperature
1 teaspoon vanilla extract
1 cup buttermilk, at room temperature
1 teaspoon white vinegar
1 teaspoon baking soda
1. Preheat oven to 350 degrees. Line two 12-cup muffin tins with cupcake papers.
2. Sift together the cake flour, baking powder, and salt into a
medium bowl; set aside. In a small bowl, mix food coloring and cocoa
powder to form a thin paste without lumps; set aside.
3. In a large bowl, using a hand mixer or stand mixer, beat butter
and sugar together until light and fluffy, about three minutes. Beat in
eggs, one at a time, then beat in vanilla and the red cocoa paste,
scraping down the bowl with a spatula as you go. Add one third of the
flour mixture to the butter mixture, beat well, then beat in half of the
buttermilk. Beat in another third of flour mixture, then second half of
buttermilk. End with the last third of the flour mixture, beat until
well combined, making sure to scrape down the bowl with a spatula.
4. In a small bowl, mix vinegar and baking soda. Yes, it will fizz!
Add vinegar mixture to the cake batter and stir well to combine. Using
an ice cream scoop, fill cupcake cups with cake batter (they should be
2/3 – 3/4 full). You may not fill all the cups, I ended up with 20
cupcakes. Place muffin tins on the middle rack of a preheated 350
degree oven. Bake for approximately 20-22 minutes, rotating pans
halfway through. Cupcakes are done when a toothpick inserted in the
center comes out clean. Check early and don’t overbake!
5. Cool the cupcakes in their tins on a wire rack for 10 minutes then
remove and allow to cool completely before frosting. Frost cupcakes
with cream cheese icing (recipe below) and decorate with red sprinkles if desired. The cupcakes above were decorated using the Wilton Cupcake Decorating Kit and Valentine’s Sprinkles. They can usually be found at craft stores like Michaels or Joann.
6. Enjoy the cupcakes with those you love!

Recipe Notes: *Sift cake flour once before
measuring, then sift again with the other dry ingredients per recipe
instructions. Wear an apron and be careful with the red food coloring–no
matter how hard I try, I always end up staining something! As you’re
mixing the cake batter, use a spatula to scrape down the bowl frequently
throughout the entire process. Since the batter is fairly thick, I
have found that an old-fashioned ice cream scoop
works best for filling the cupcake wells (also great for muffin
batter!). Since all ovens are different, make sure you check the
cupcakes a little early. Mine were ready in just over 2o minutes, yours
may be done sooner, or they may take a minute or two longer.
Cream Cheese Frosting
16 oz. cream cheese (2 packages), softened
1/2 cup unsalted butter (one stick), softened
1 teaspoon vanilla extract
2 1/2 cups powdered sugar, sifted
pinch of salt
1/2 cup unsalted butter (one stick), softened
1 teaspoon vanilla extract
2 1/2 cups powdered sugar, sifted
pinch of salt
With an electric mixer, blend together cream cheese and butter until
smooth. Turn mixer to low speed and blend in powdered sugar, salt and
vanilla extract. Turn mixer on high and beat until light and fluffy.
Use immediately or refrigerate, covered, until ready to use. If
refrigerated, the frosting will need to be brought to room temperature
before using (after frosting softens up, beat with mixer until smooth).
Recipe Notes: If you prefer a sweeter and/or stiffer
frosting, more powdered sugar can be added (up to four cups). But
remember, the more sugar you add, the less you’ll be able to taste the
tangy cream cheese!
No comments:
Post a Comment